In this guide, we'll show you how to use CommentGPT's Text Insert feature to seamlessly insert refined text back into the social media platform. Whether you're crafting thoughtful comments, engaging with your audience, or building your online presence, CommentGPT makes improving your social media interactions effortless.
Before diving into its advanced tools, let's make sure CommentGPT is set up and ready to go. If you're already up and running, feel free to skip ahead. If not, here are some quick steps to get started:
- Install CommentGPT: If you haven’t installed it yet, click here for step-by-step instructions.
Now that you're ready, let's explore how CommentGPT can elevate your social media interactions – whether it's crafting thoughtful comments, building brand visibility, or engaging with a global audience!
Step 1: Activating CommentGPT:
CommentGPT supports Facebook, Instagram, Twitter, and LinkedIn. You can launch CommentGPT from any of these platforms.
- Launch CommentGPT: Activate the extension easily by clicking here. This gives you access to all its powerful features, from context-aware comment generation to advanced image analysis.
Step 2: Generate post comments with CommentGPT
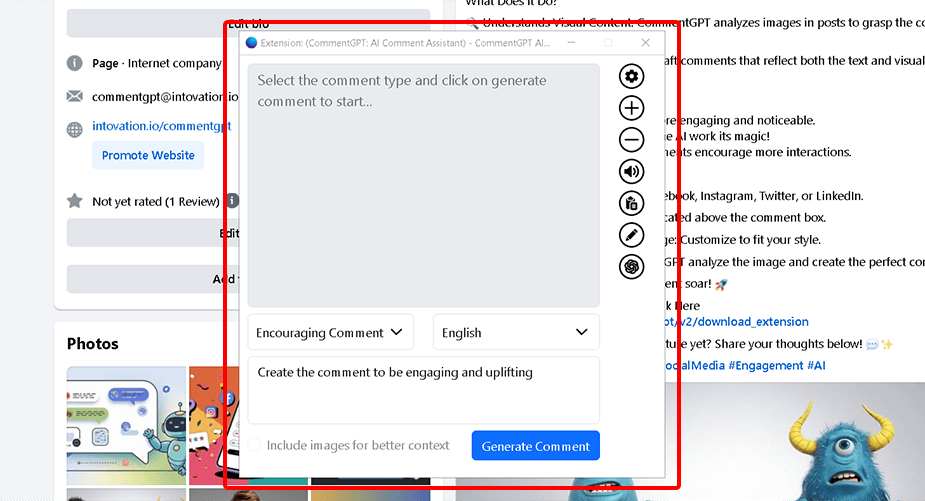
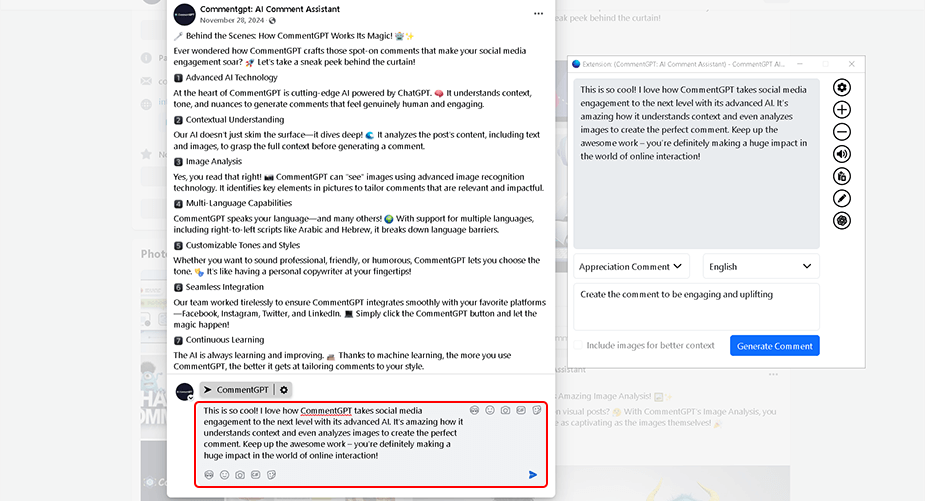
- Once you launch CommentGPT, you'll see a comment area ready for you to get started. From here, you can explore all of CommentGPT's powerful features: select the comment type you'd like to generate, such as positive, neutral, funny, informative, constructive, encouraging, question, suggestion, or appreciation. You can also choose the language for the generated comment, ensuring it matches your audience's preferences and context seamlessly.

Step 3: Choose a Comment Type and Add Instructions
- Select a comment type from the 'Comment Type' dropdown and specify the language for the generated comment. Additionally, you can provide extra instructions to customize the output according to your preferences.
Step 4: Generating the Enhanced Comment:
- Once you have selected the comment type and entered any additional instructions, click the action button. This prompts CommentGPT to process your request.
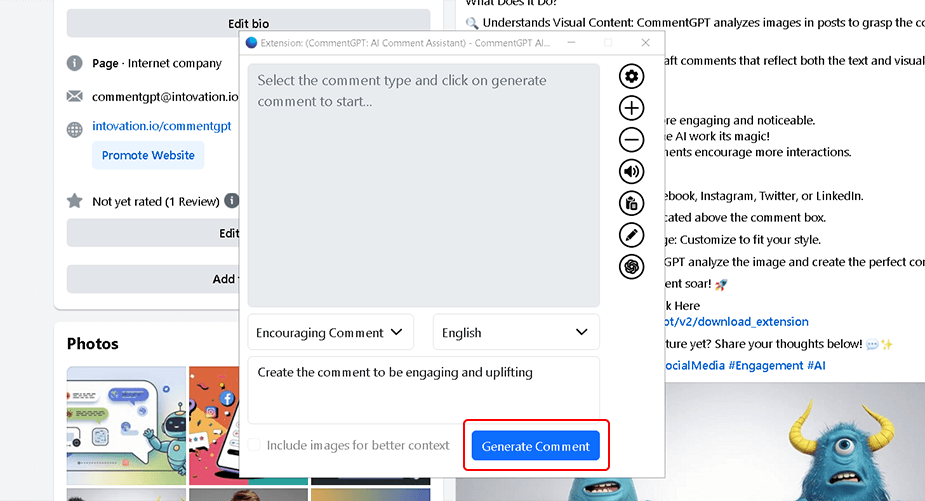
- The AI tool will analyze the post, apply the selected tone—whether positive, neutral, or constructive—and generate the most contextually appropriate comment.
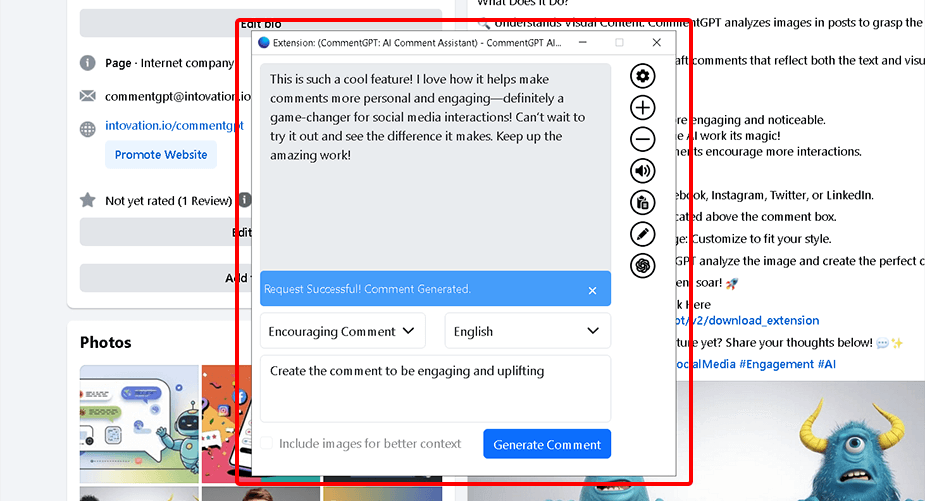
Step 5: Reviewing and Finalizing Your Content
- After CommentGPT generates the enhanced content, take a moment to review it carefully. Ensure that the suggestions align with your intended message, tone, and purpose.
Step 6: Using the Text Insert Function
- Once you are satisfied with the generated comment, you can seamlessly use it wherever needed.
- Copy the enhanced comment generated by CommentGPT and paste it into your desired location, or use the tool's built-in features to insert it directly, if supported.
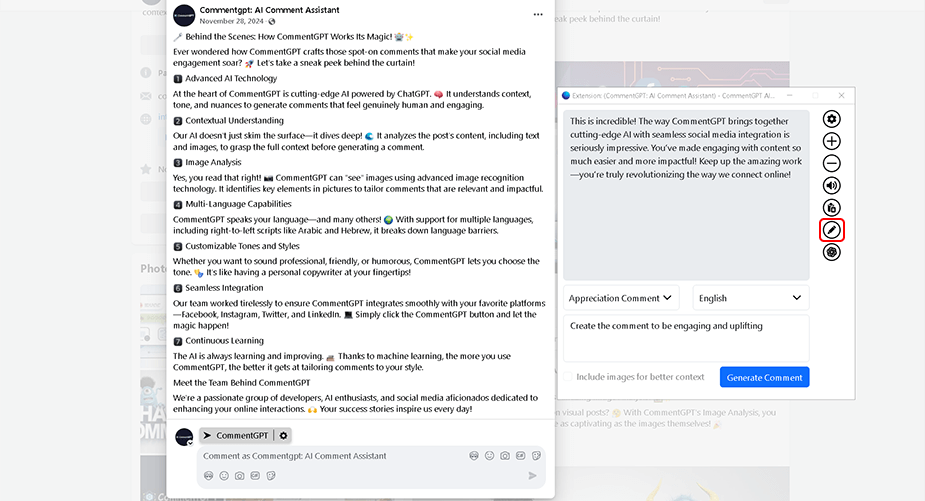
Step 7: Insert the Text
- Click the text insert button to insert the comment to the text box and publish it.
Conclusion
CommentGPT makes social media engagement effortless with its powerful features like the Text Insert function, allowing you to craft polished, context-aware comments seamlessly across platforms. From selecting comment types to customizing tone and language, CommentGPT ensures your responses are professional, engaging, and tailored to your audience. Whether building your brand or enhancing interactions, CommentGPT saves you time and elevates your content with ease.